Getting Started
Welcome to 1stLine by Burava.
This guide follows the first setup path from account creation to a working test escalation. By the end, you should have one Alert Producer sending to 1stLine, one Alert Receiver receiving the alert, and one basic Escalation Flow ready to test.
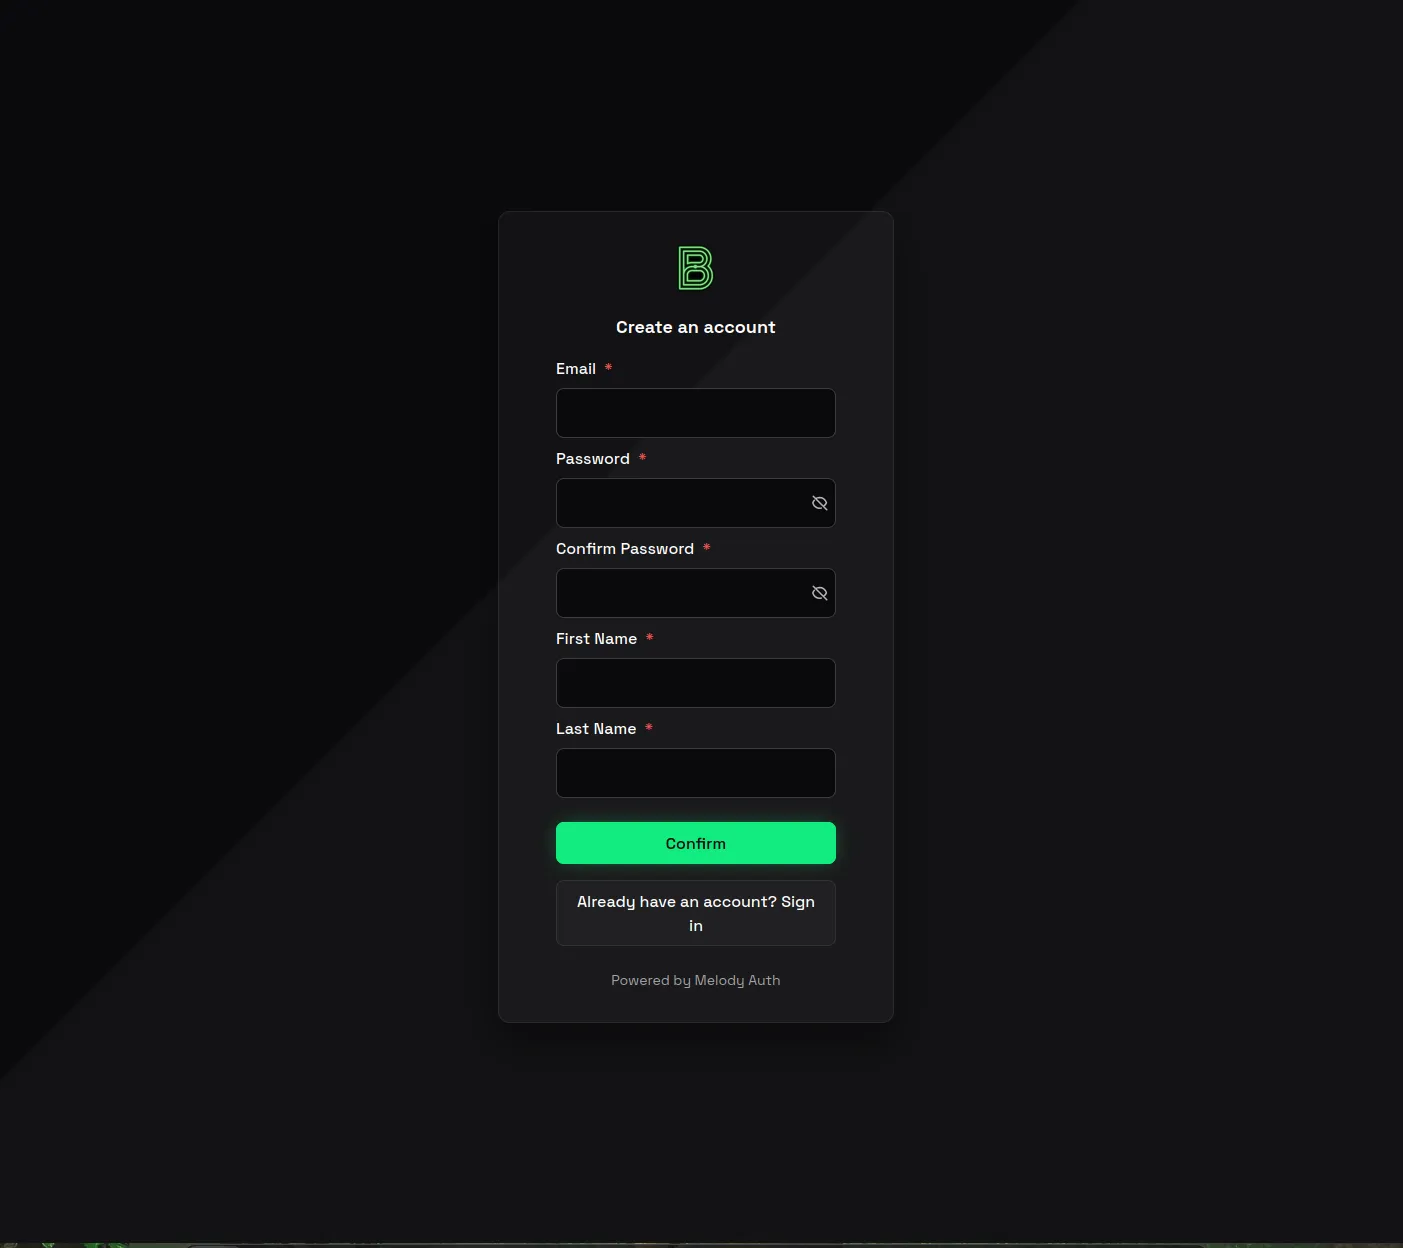
1. Sign up with Burava
- Go to Burava signup for 1stLine.
- Create your account with Google* or with a username and password.
- Check your email for the confirmation link.
- Open the confirmation link and finish email verification.
2. Create your organization and activate 1stLine
- Create your Burava organization.
- Choose the Public Preview plan.
- Complete checkout when prompted.
- After checkout, return to the platform.
- Confirm that you can see an active 1stLine product assignment.
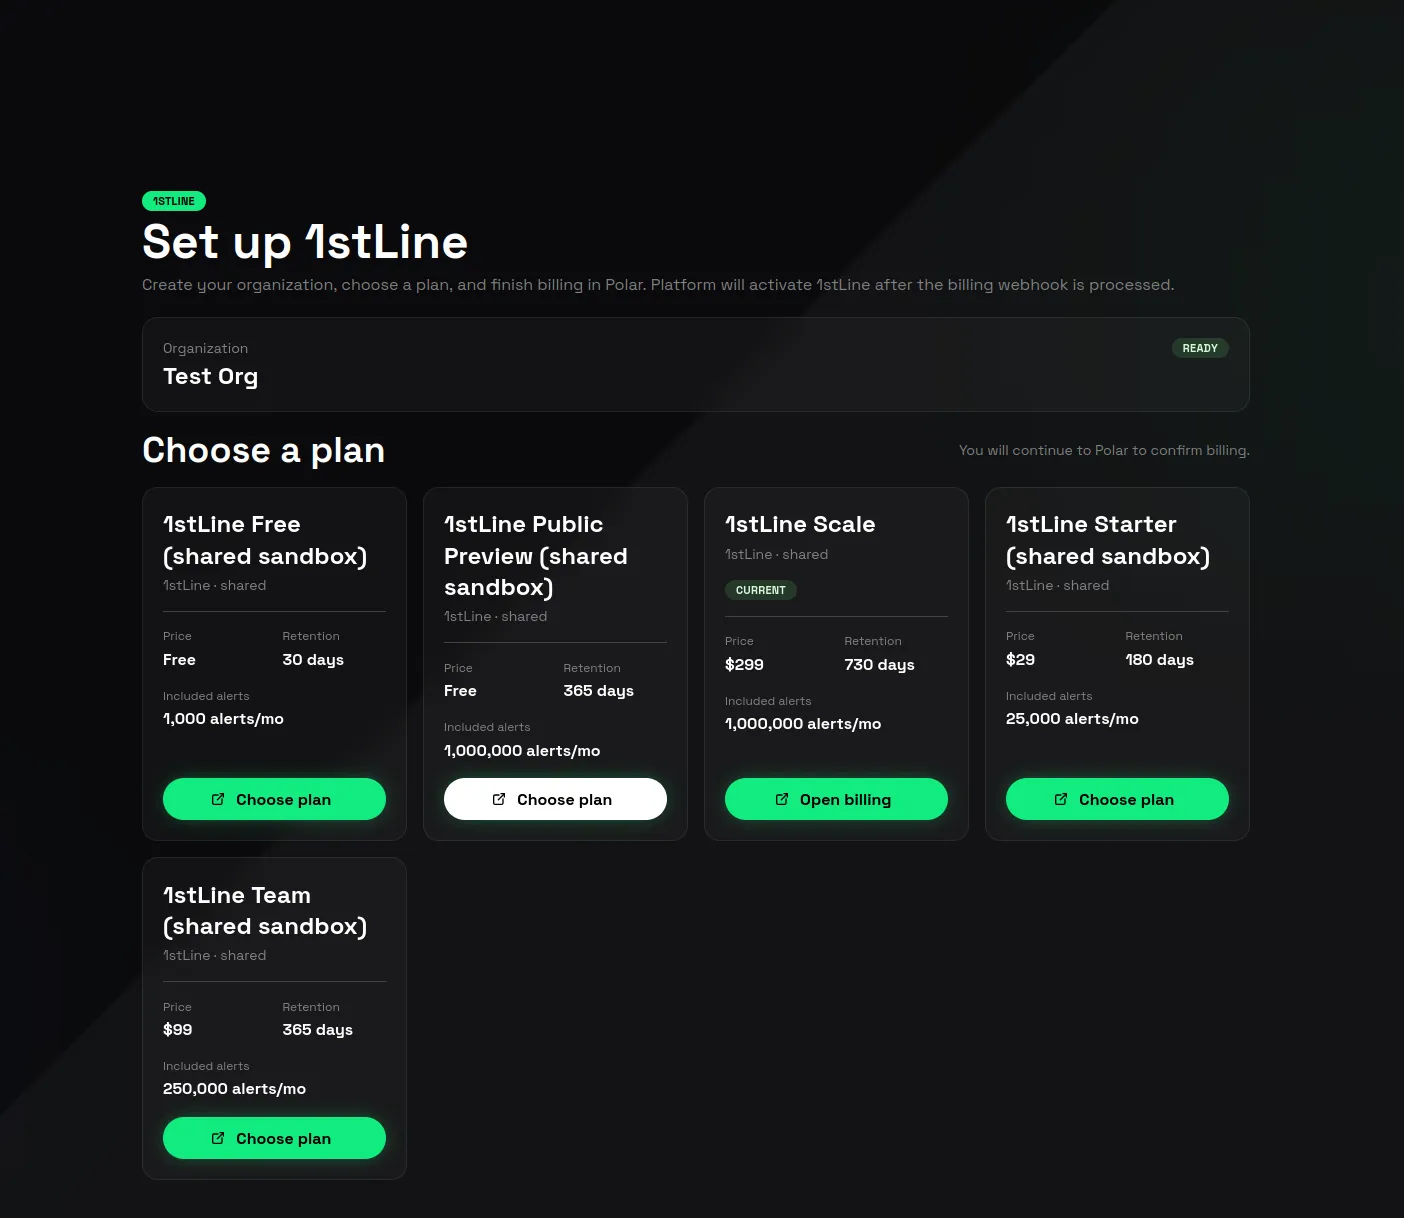
See Billing and Limits for more information about plans, preview terms, and usage limits.
As the first user of the organization, you should have admin access for the 1stLine setup.
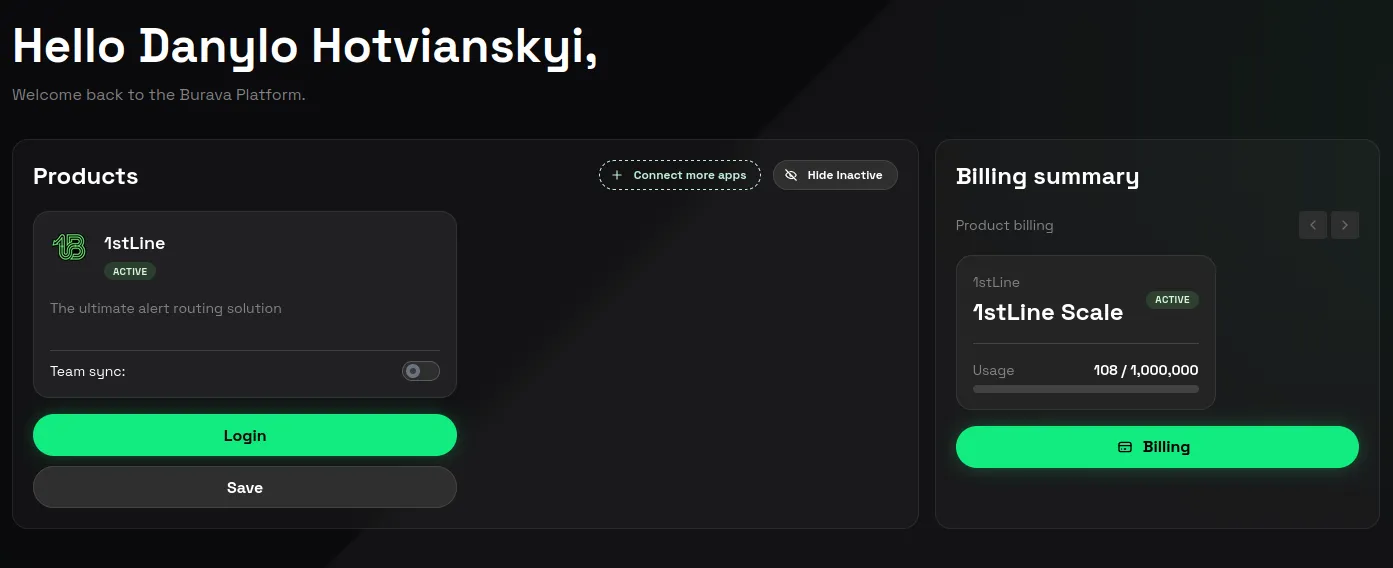
If you don’t want to synchronize Teams from Burava Platform to 1stLine:
- Click Edit icon under the 1stLine assignment in the Products section.
- Disable toggle for Team Sync.
- Click Save.
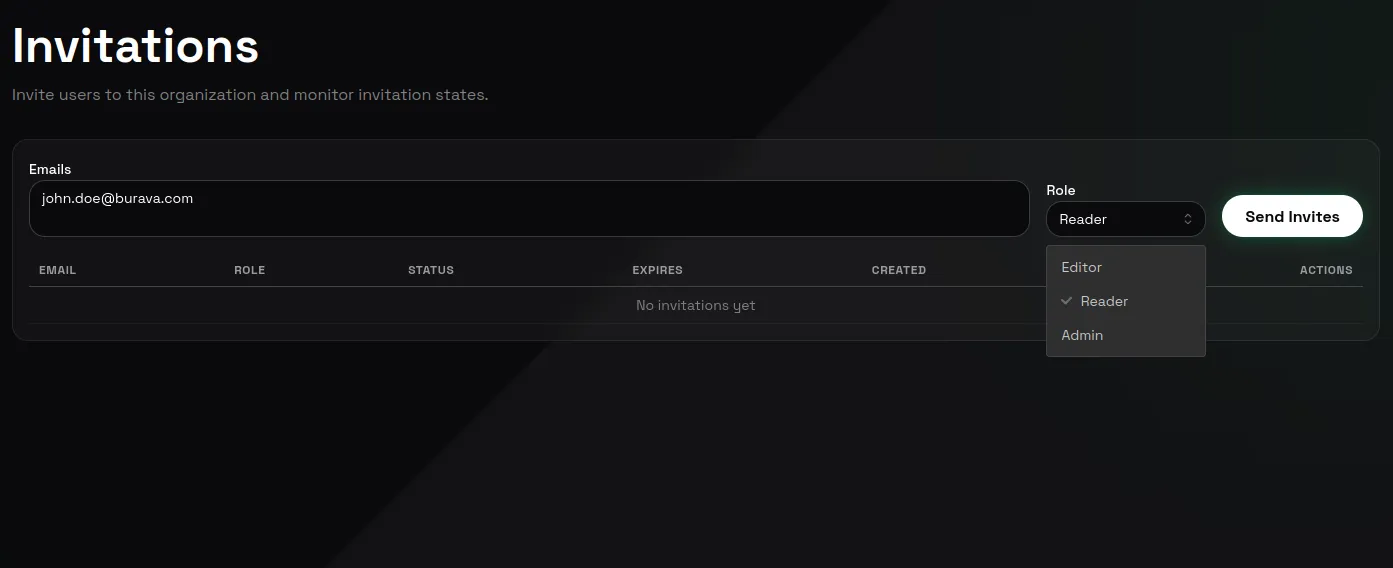
3. Invite teammates if needed
- Open Platform invitations.
- Invite the teammates who should help configure or test the first escalation.
Invitation abuse limits can apply. See Billing and Limits for more information about limits. If an invitation is blocked unexpectedly, contact Burava support.
4. Open 1stLine
- Open Home.
- Click the login button for 1stLine.
- Complete the 1stLine login flow.
If you see a Product is not assigned error, contact support@burava.com. See Access Troubleshooting for more information about login and product assignment issues.
5. Verify your phone number
- Open Profile.
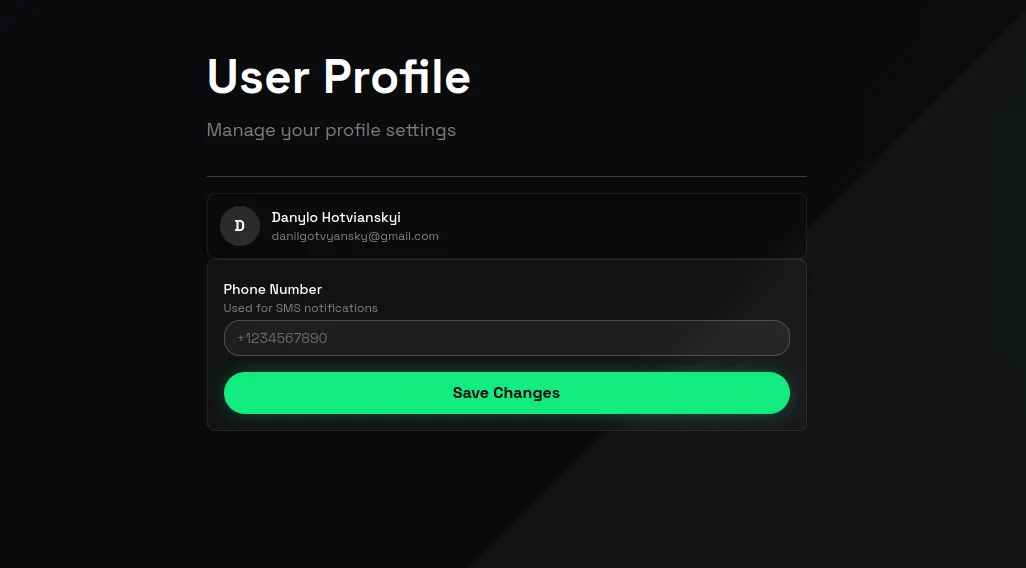
- Add your phone number.
- Follow the verification instructions.
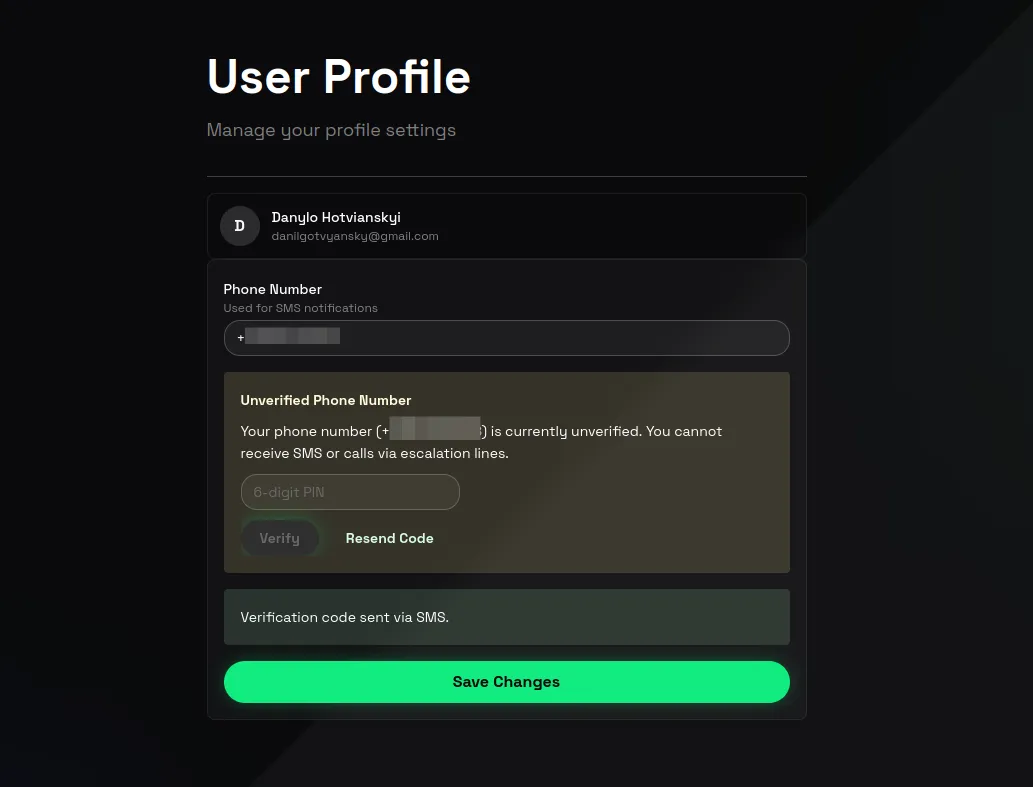
You can verify your phone number even if your current plan does not include a default communication integration. See Communication for more information about communication setup.
6. Configure your first Alert Schema
- Open Alert Schemas.
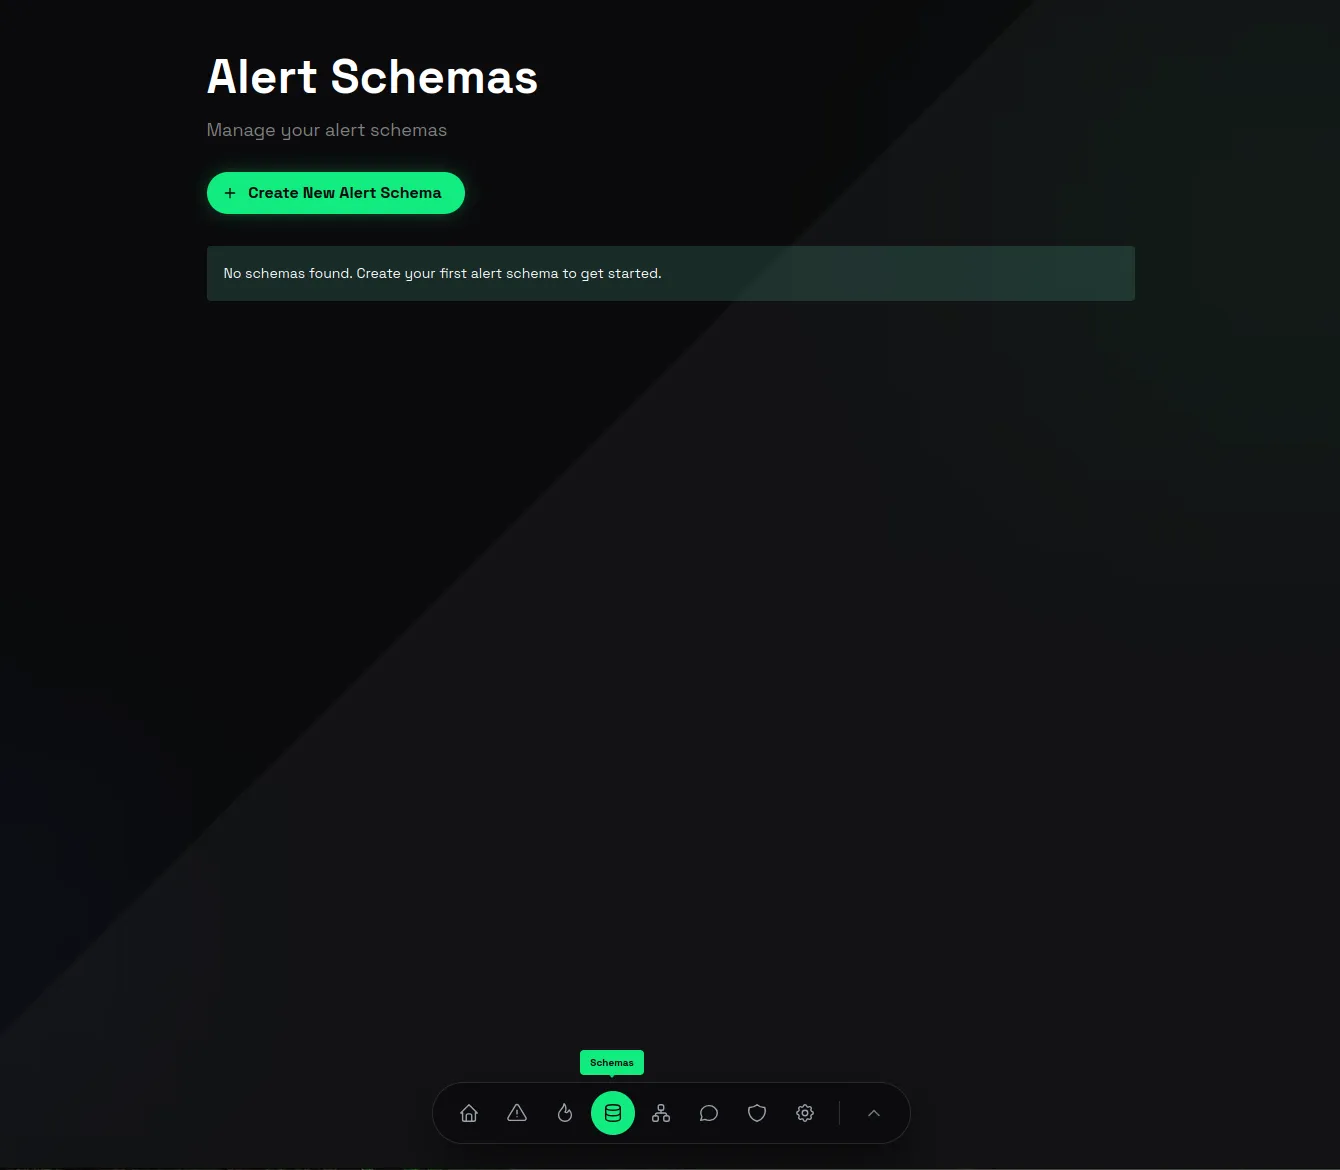
- Choose an included schema from Library that matches your Alert Producer and Alert Receiver, or open Create New Alert Schema to create a custom schema manually.
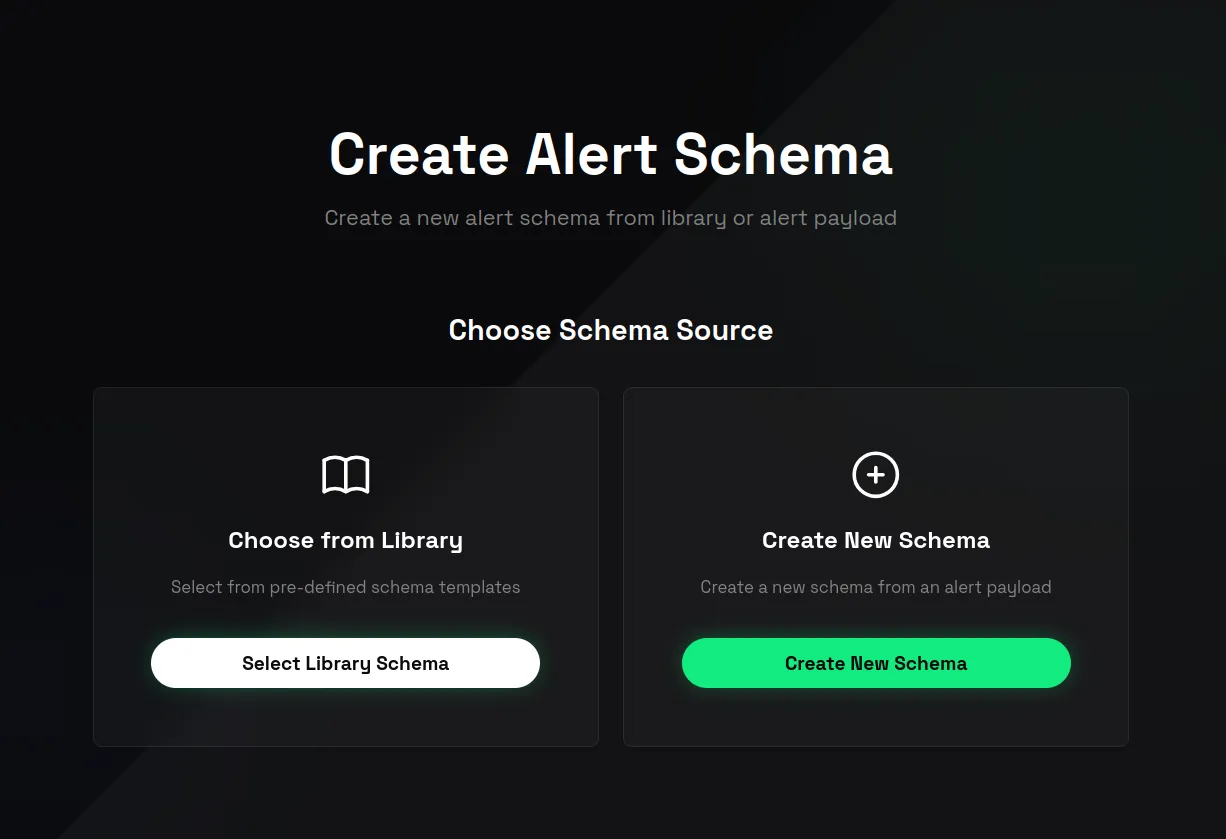
- If you choose Library, follow Create Schema from Library Schema.
- If you want to test a custom schema, follow Create Custom Schema.
- Save the Alert Schema.
See Alert Schemas for more information about Library Schemas, custom schemas, Schema Patterns, Schema Transformations, Default Forward To, Proxy recurrent alerts, and AI Escalation Mapping.
7. Copy Alert Producer Destination
- Open Alert Schemas and select your schema.
- Find Alert Producer Destination.
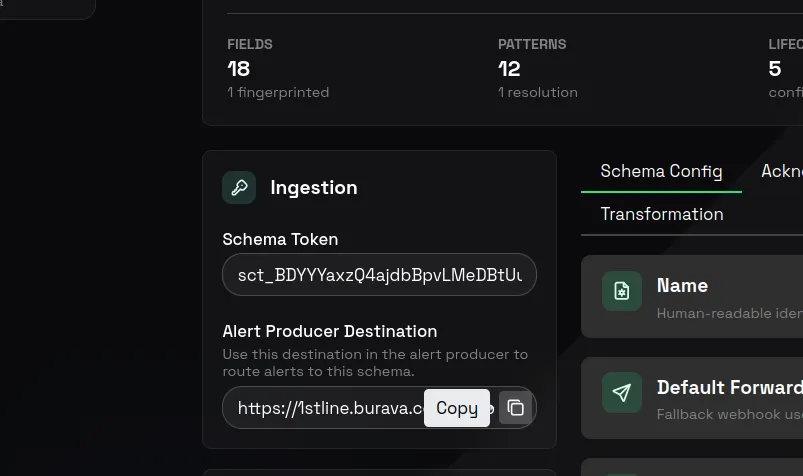
- Copy and replace the
forwardToplaceholder with the real Alert Receiver destination webhook or API endpoint.
The destination includes the Schema Token and organization context needed by 1stLine. See Alert Schemas for more information about forwarding and receiver behavior.
8. Configure your Alert Producer and Alert Receiver
In your Alert Producer, configure the receiver per Producer’s documentation, but replace the destination address with the copied Alert Producer Destination from Alert Schema details.
This lets 1stLine receive the Alert Event first, create or update an Alert Instance, and forward the alert to the configured Alert Receiver.
Open Alert Instances and confirm the test alert appears. If no routing setup exists yet, the alert can show Orphan escalation status. See Alert Schemas Troubleshooting if the alert does not appear in 1stLine or in the receiver.
9. Set up Communication Integrations
If you want call or SMS communication, open Communication Integrations and confirm your communication integration is ready.
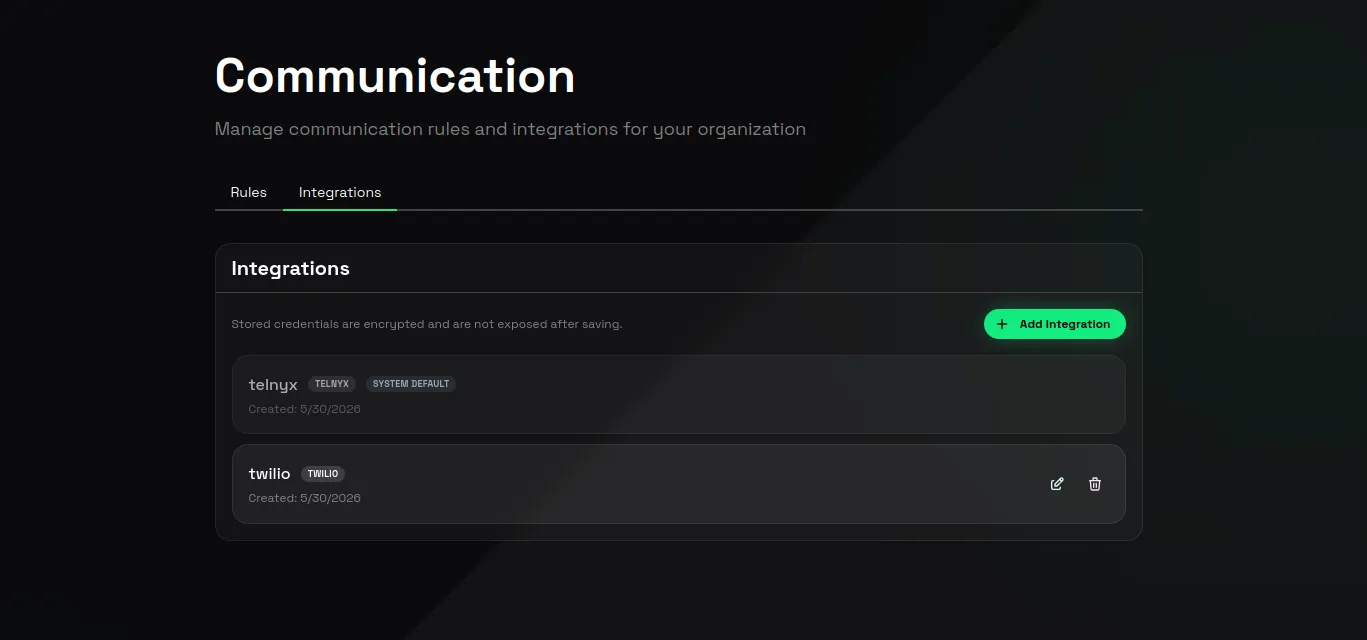
If your plan does not include a default communication integration, set up your own integration before testing calls or SMS. See Communication for more information about Communication Integrations and Bring-Your-Own setup.
10. Create a Communication Rule and Routine
- Open Communication Rules.
- Create your first Communication Rule.
- Add a Communication Routine.
- For the first test, enable the actions you want to test.
- Use a catch-all condition while you are validating the first flow.

You can narrow the Communication Conditions later, after the first escalation works.
See Communication for more information about Communication Rules, Communication Routines, and Communication Conditions.
11. Create a Chain
- Open Escalation.
- Create your first Chain.
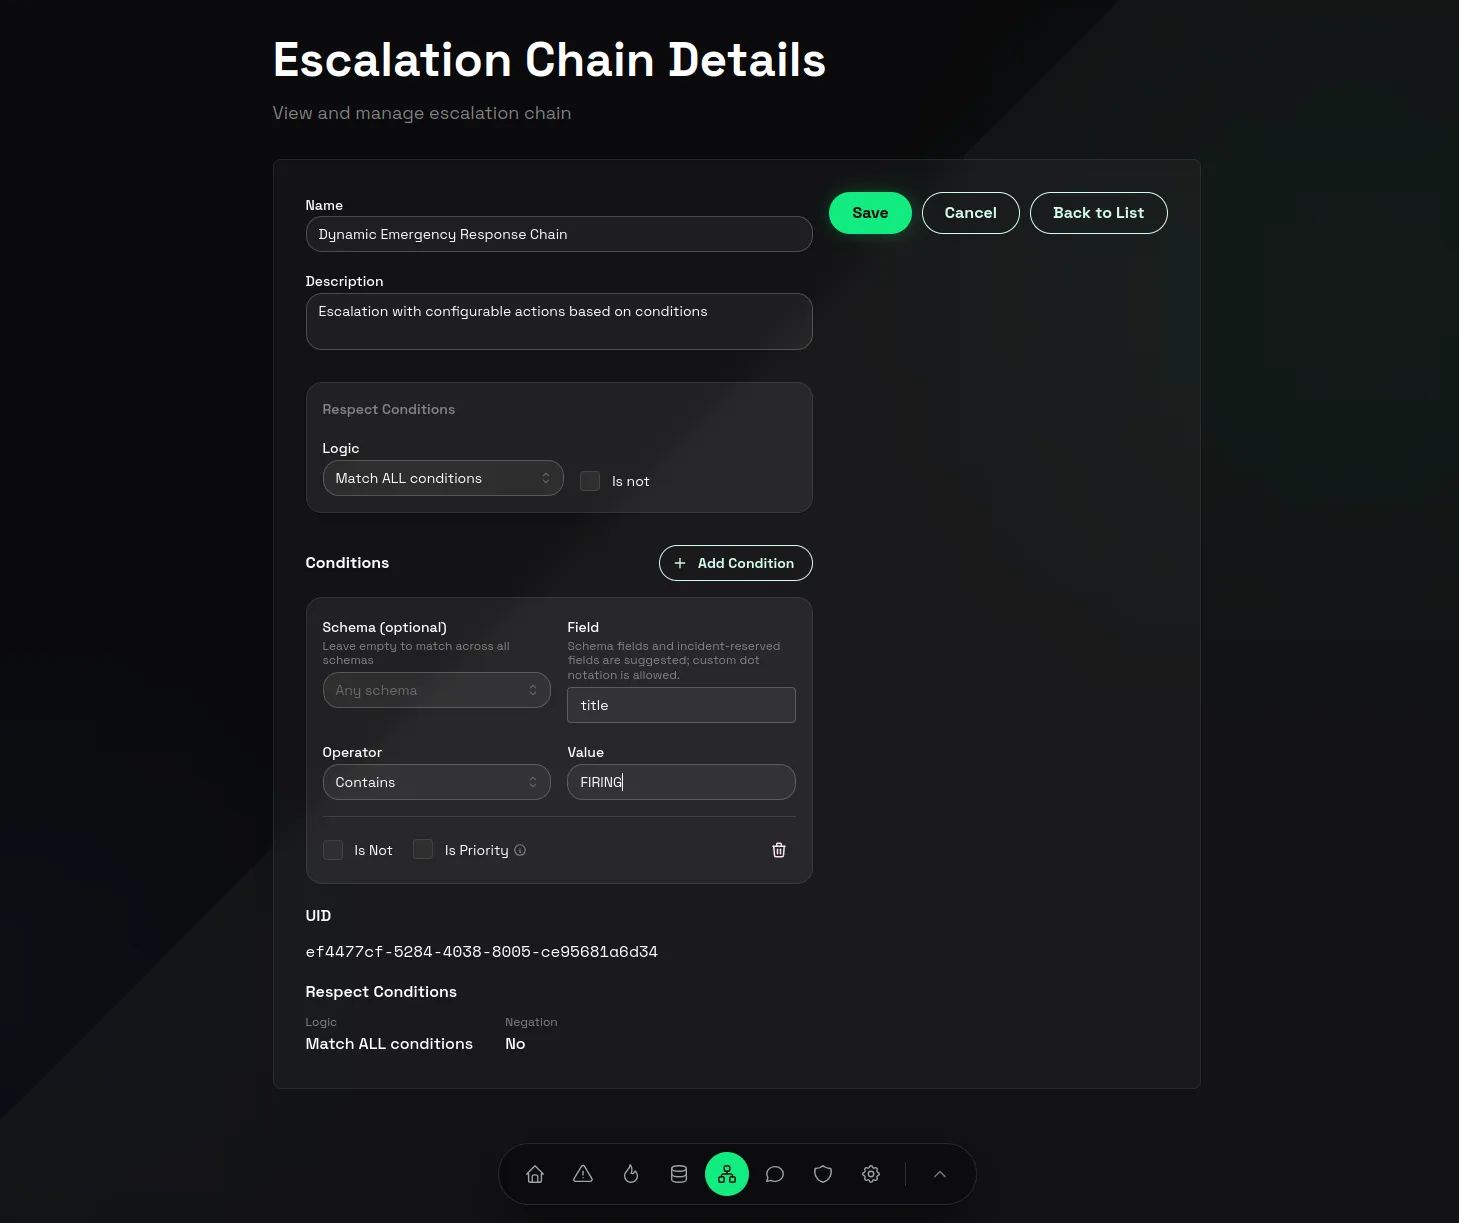
- Follow the app instructions and keep the first Chain simple.
See Escalation for the Escalation overview, Chains for path design, and Lines and Line Members for step and responder setup.
12. Create a Line
- Open Lines.
- Create a Line for the Chain.
- Set a line timeout that is short enough for testing.
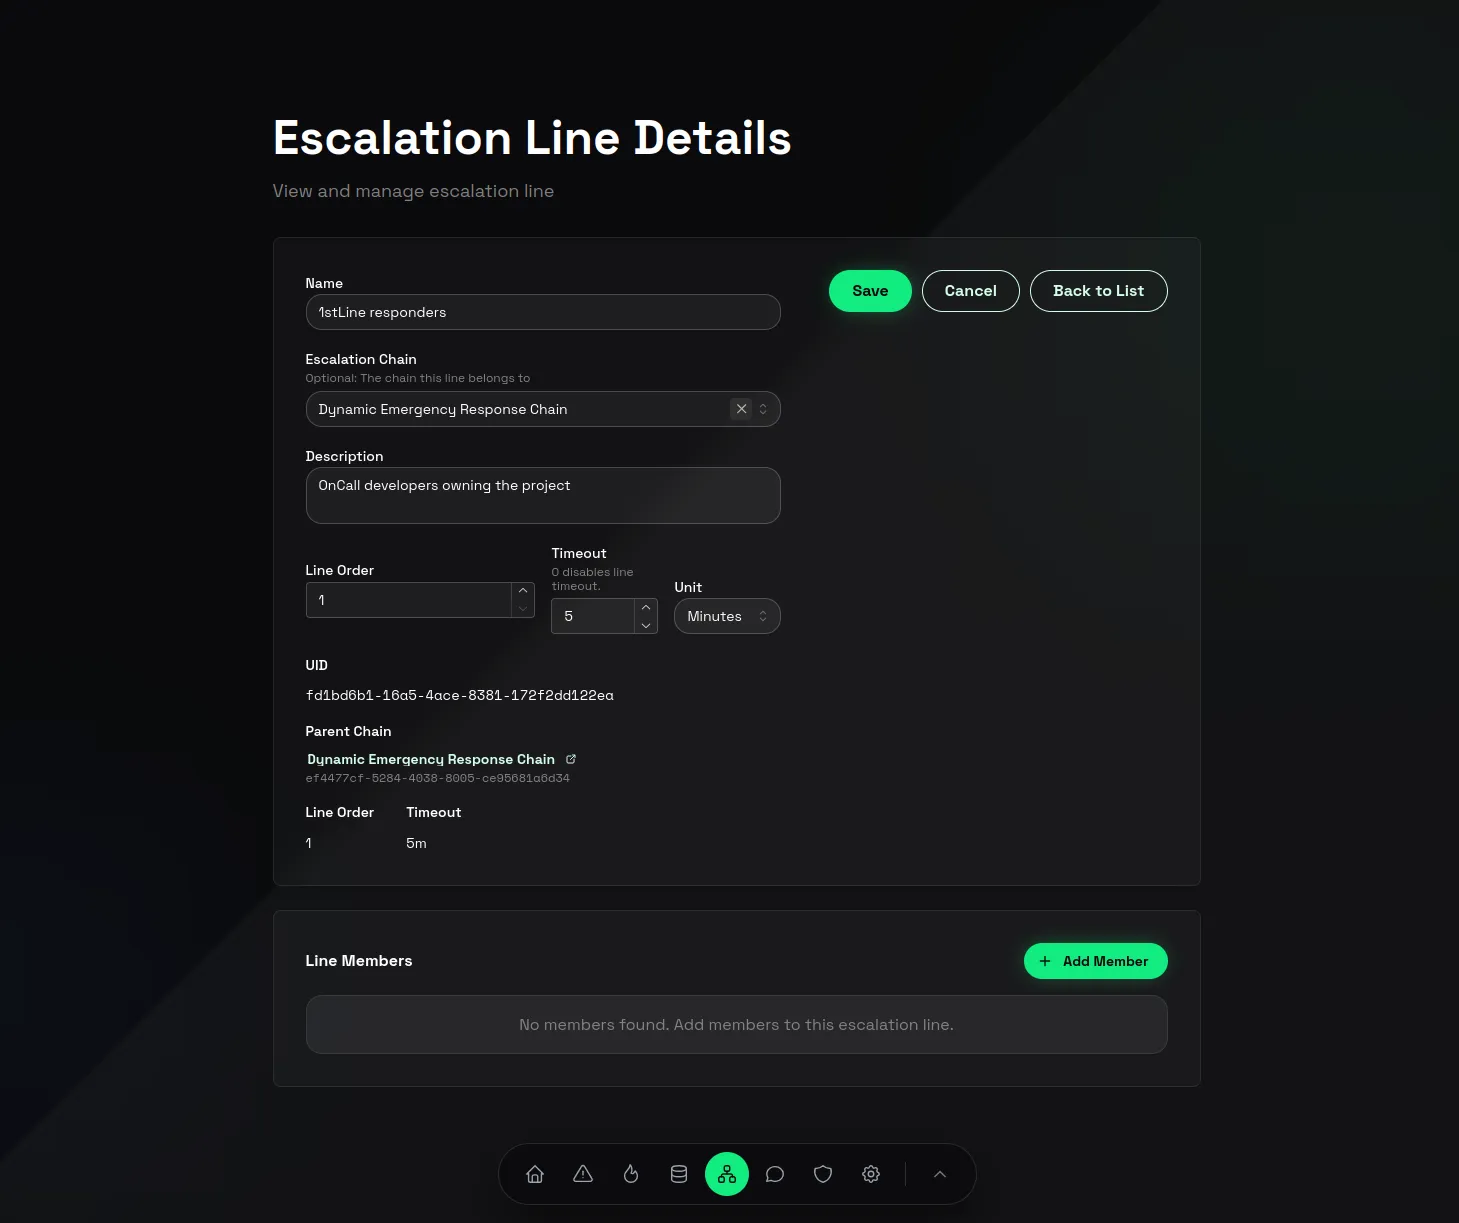
13. Add your first Line Member
- Add a Line Member to the Line.
- Set Member Type to User.
- Choose yourself as the User.
- Choose the Communication Rule you created earlier.
- Set the repeat interval you want to test.
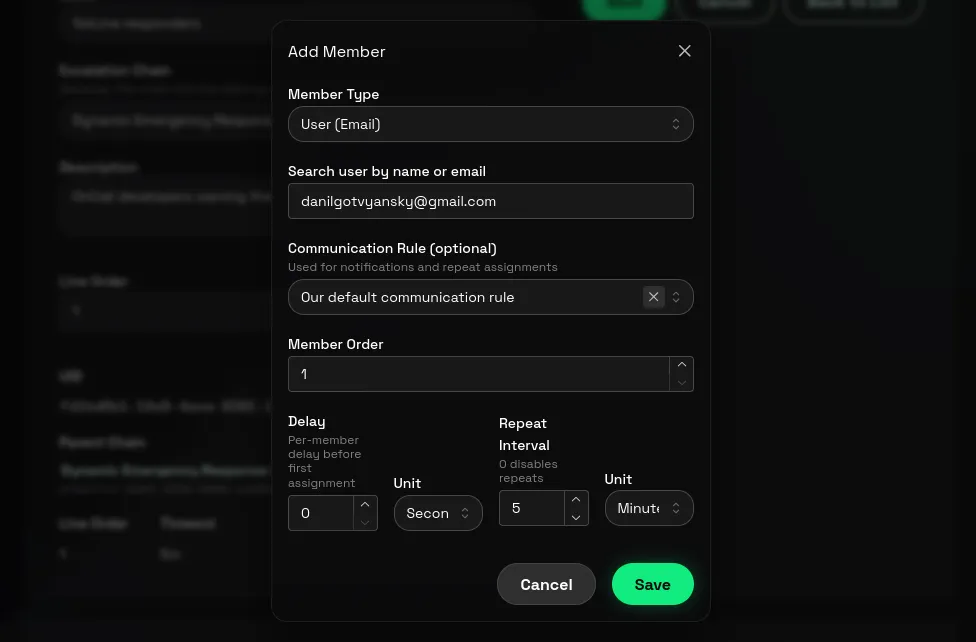
If you cannot set the repeat interval, check that your phone number is verified and that the Line Member has a Communication Rule.

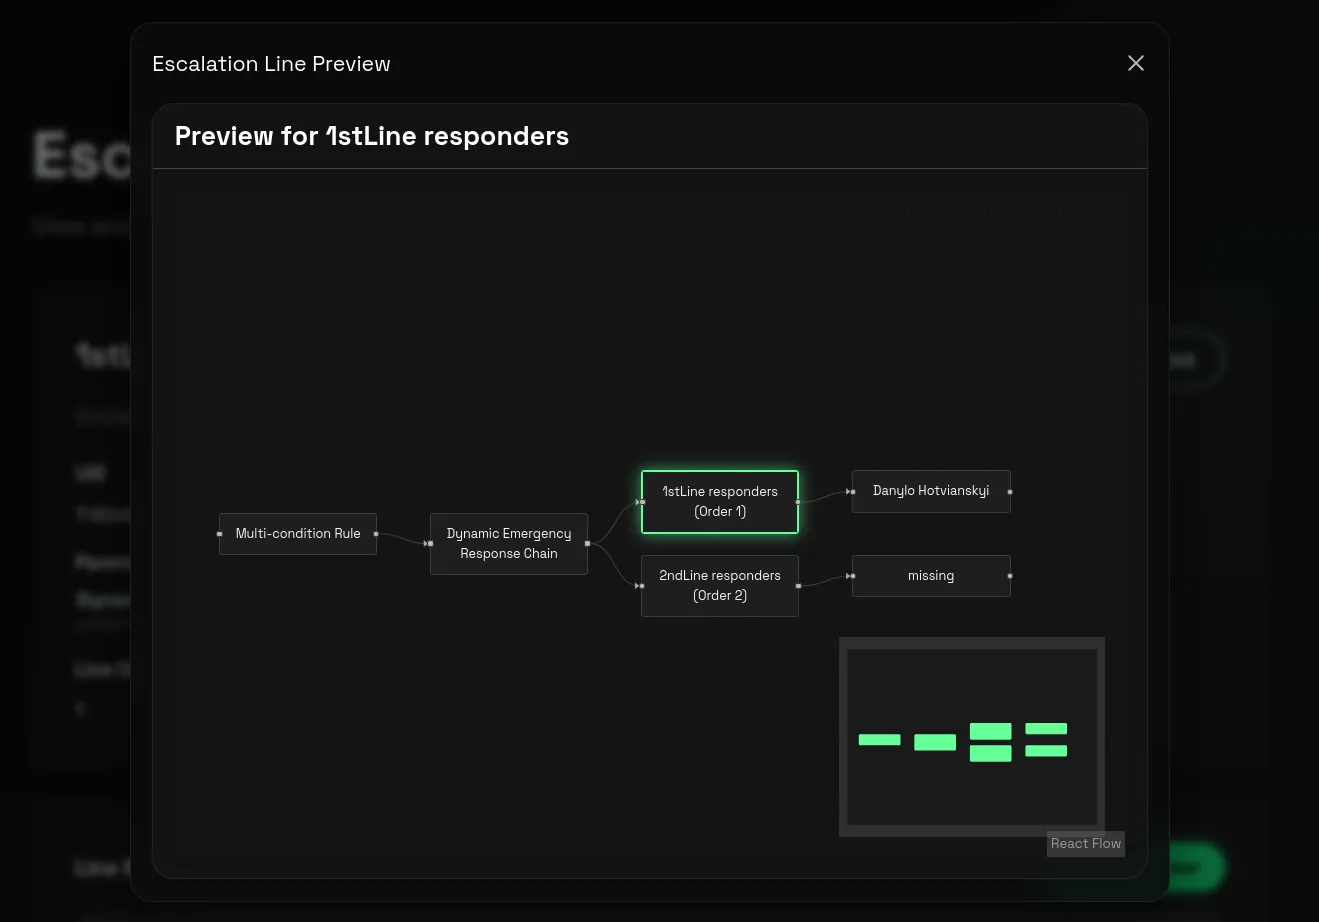
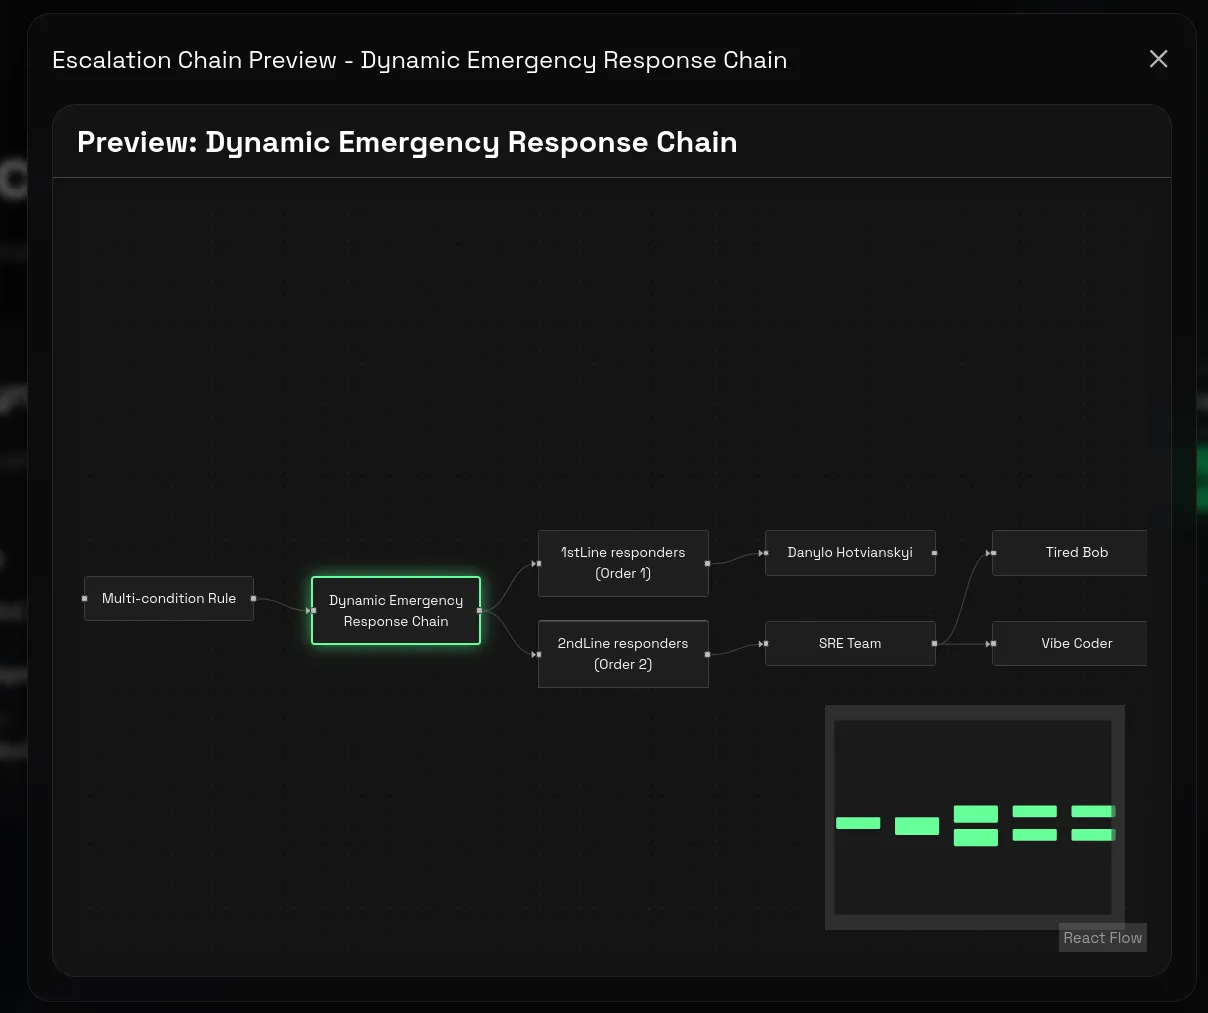
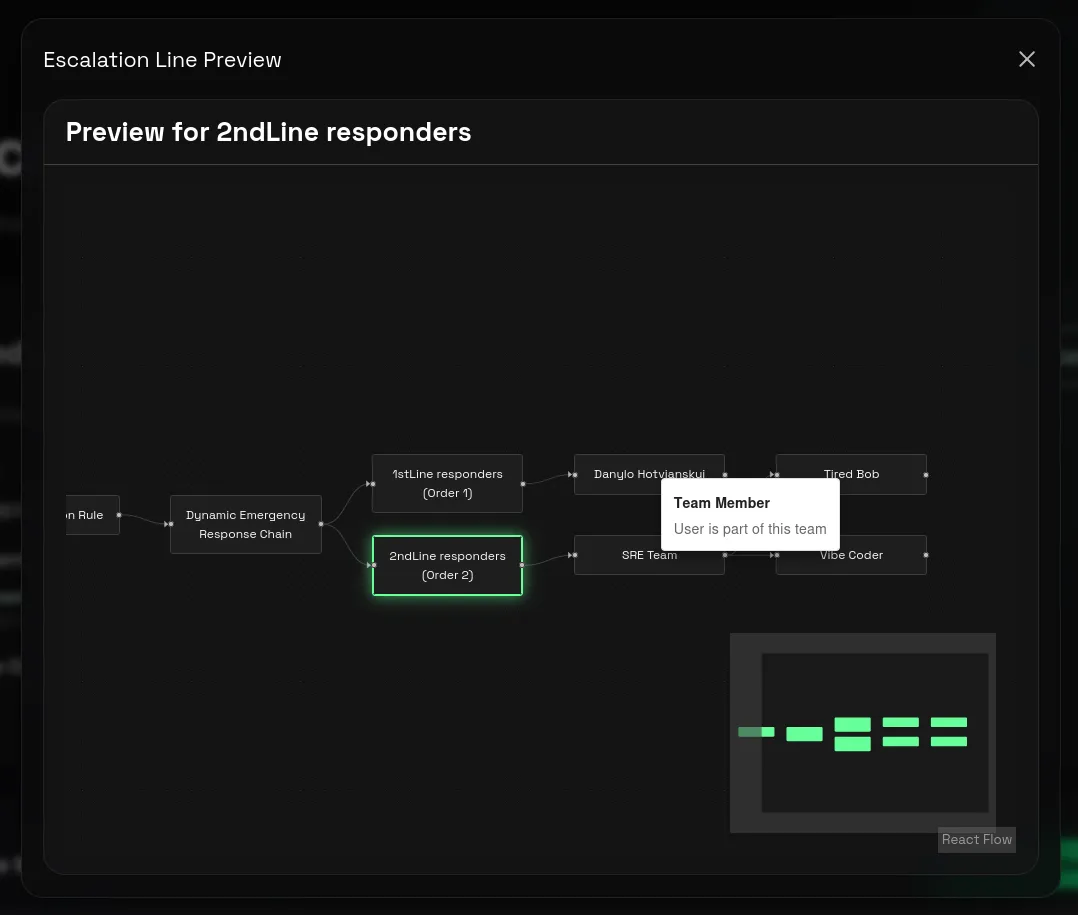
- Click Preview Line to check the whole Escalation Flow that you just set up and hover over the connecting lines to see the explanation of each step.
If your responder changes by time, use Schedules instead of a fixed User. See Lines and Line Members for Line Member types and Schedules for rotation-based coverage.
14. Create a Routing Rule
- Open Routing Rules.
- Create a Routing Rule for the Alert Schema.
- For the first test, use a catch-all condition.
- Route matching Alert Instances to the Chain you created.
- Save and enable the Routing Rule.
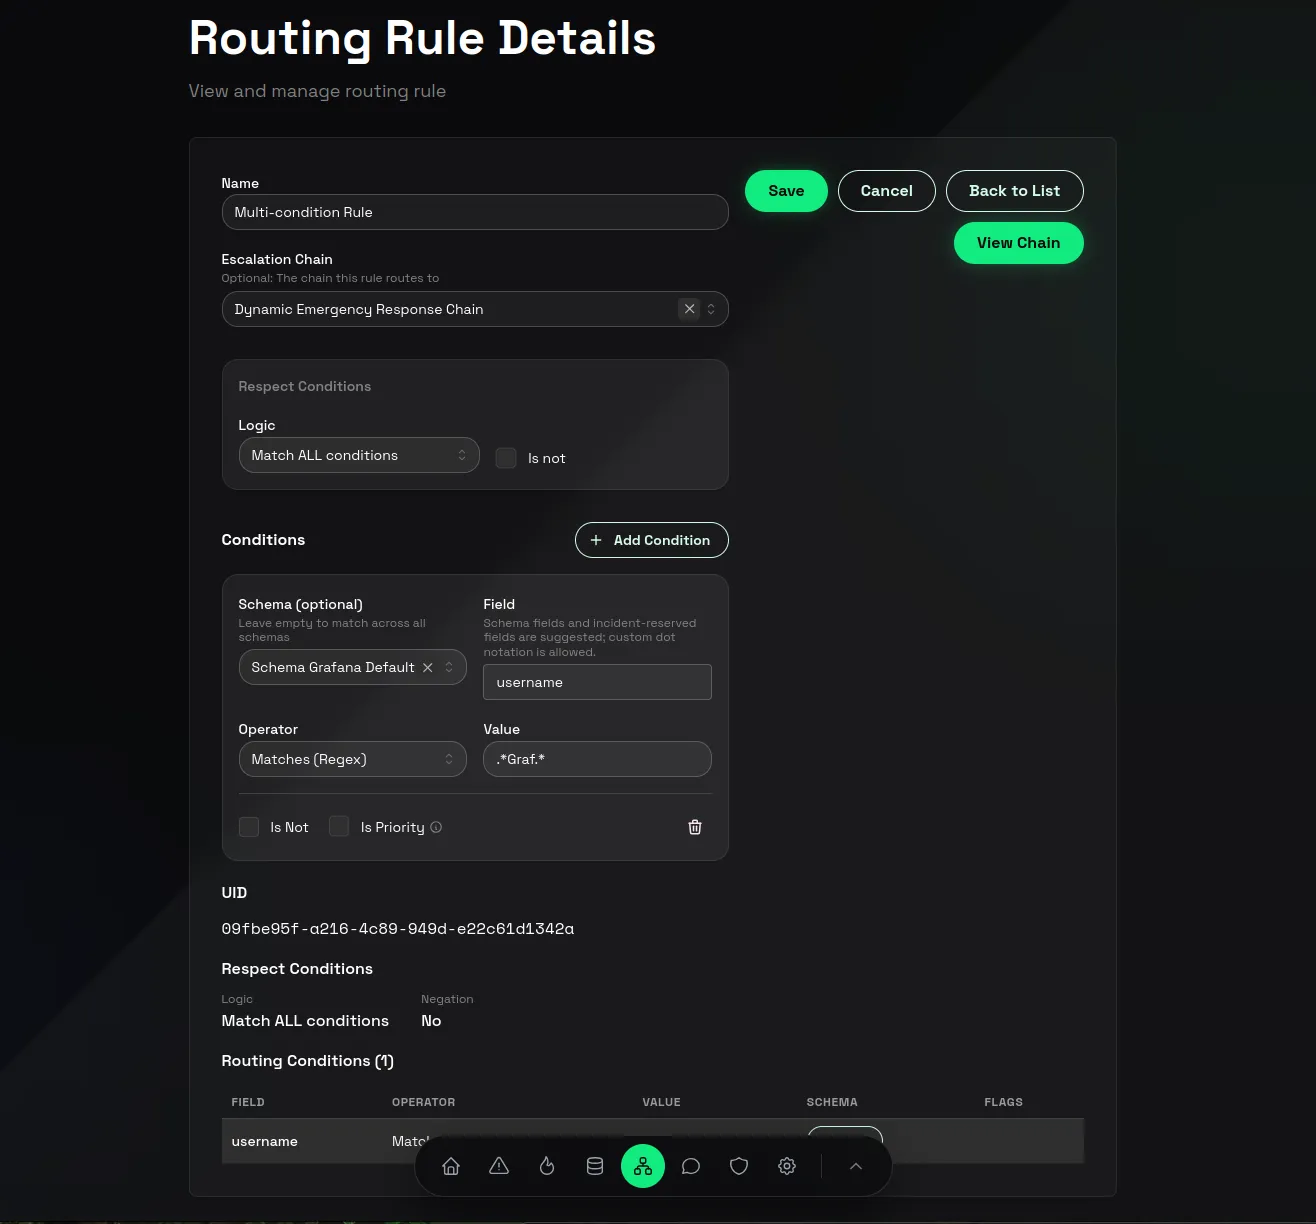
See Routing Rules for more information about Routing Conditions and Chain matching.
When you later match on priorities such as P1 or P2, enable Is Priority on the condition so greater than and less than operators are evaluated as priority comparisons.
15. Preview Escalation
- Open Home or any escalation component you configured.
- Use preview escalation to see how the alert should move through the Escalation Flow.
- Confirm the preview shows the intended Chain and connected escalation steps.
- Hover over connecting lines in the preview to see the explanation of the flow.
- On Home, confirm that your on-call state looks correct.
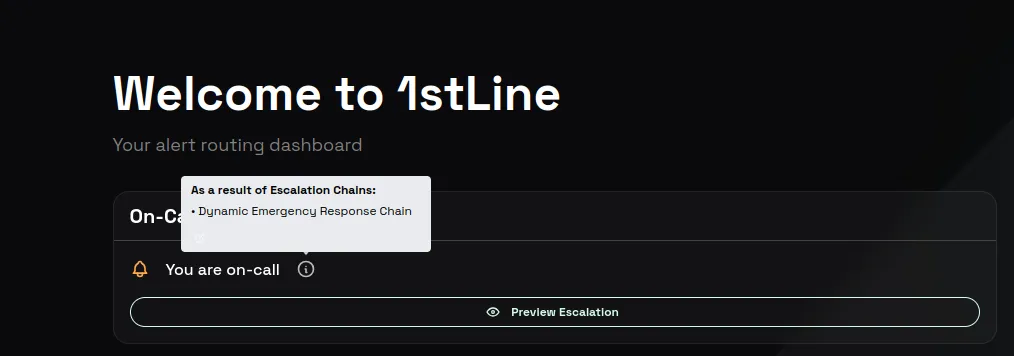
Use this before every real test alert. It is much faster to fix a wrong path in preview than after calls, messages, or assignments have already gone out.
See Escalation for the model overview and Chains for previewing the path before live tests.
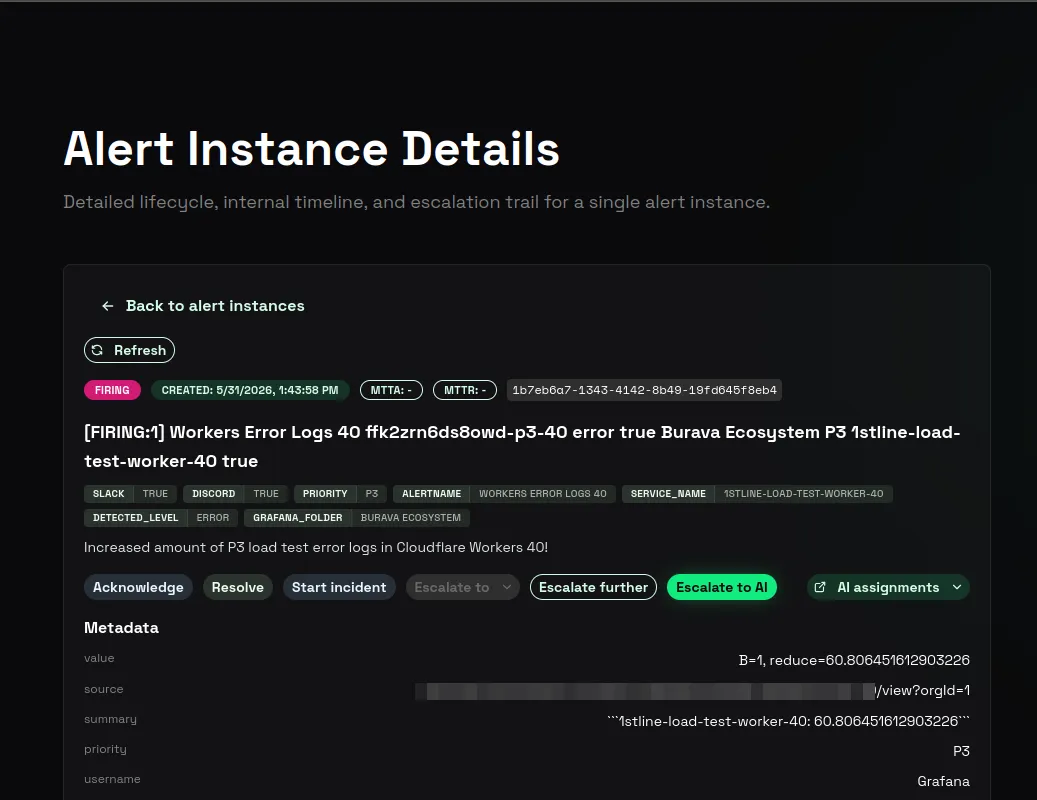
16. Send the real test alert
- Send a test alert from your Alert Producer to the copied Alert Producer Destination.
- Open Alert Instances.
- Confirm the Alert Instance is no longer Orphan and is routed to your Chain.
- Wait for the call or SMS if you configured communication.
- Respond with the action you want to test.
You have now configured your first Escalation in 1stLine.
See Alert Instances for more information about the full path from Alert Event to Alert Instance, Escalation, lifecycle metrics, timeline history, and response actions.
17. Optional: Try AI Escalation
If your plan includes AI Escalation and you want AI-assisted diagnostics:
- Open AI Escalation.
- Create a controller Connection.
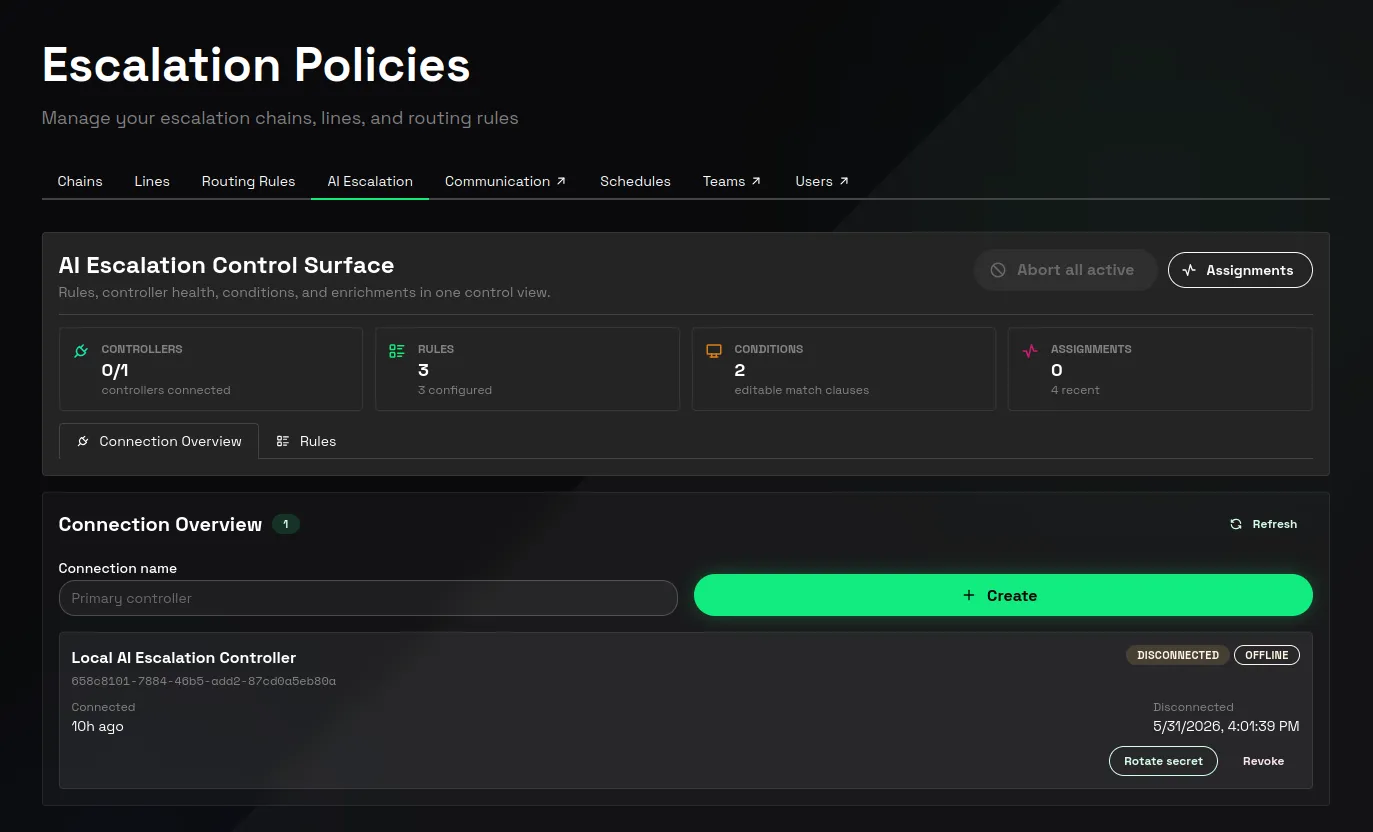
- Run your AI Escalation Controller in your local environment with the connection secret.
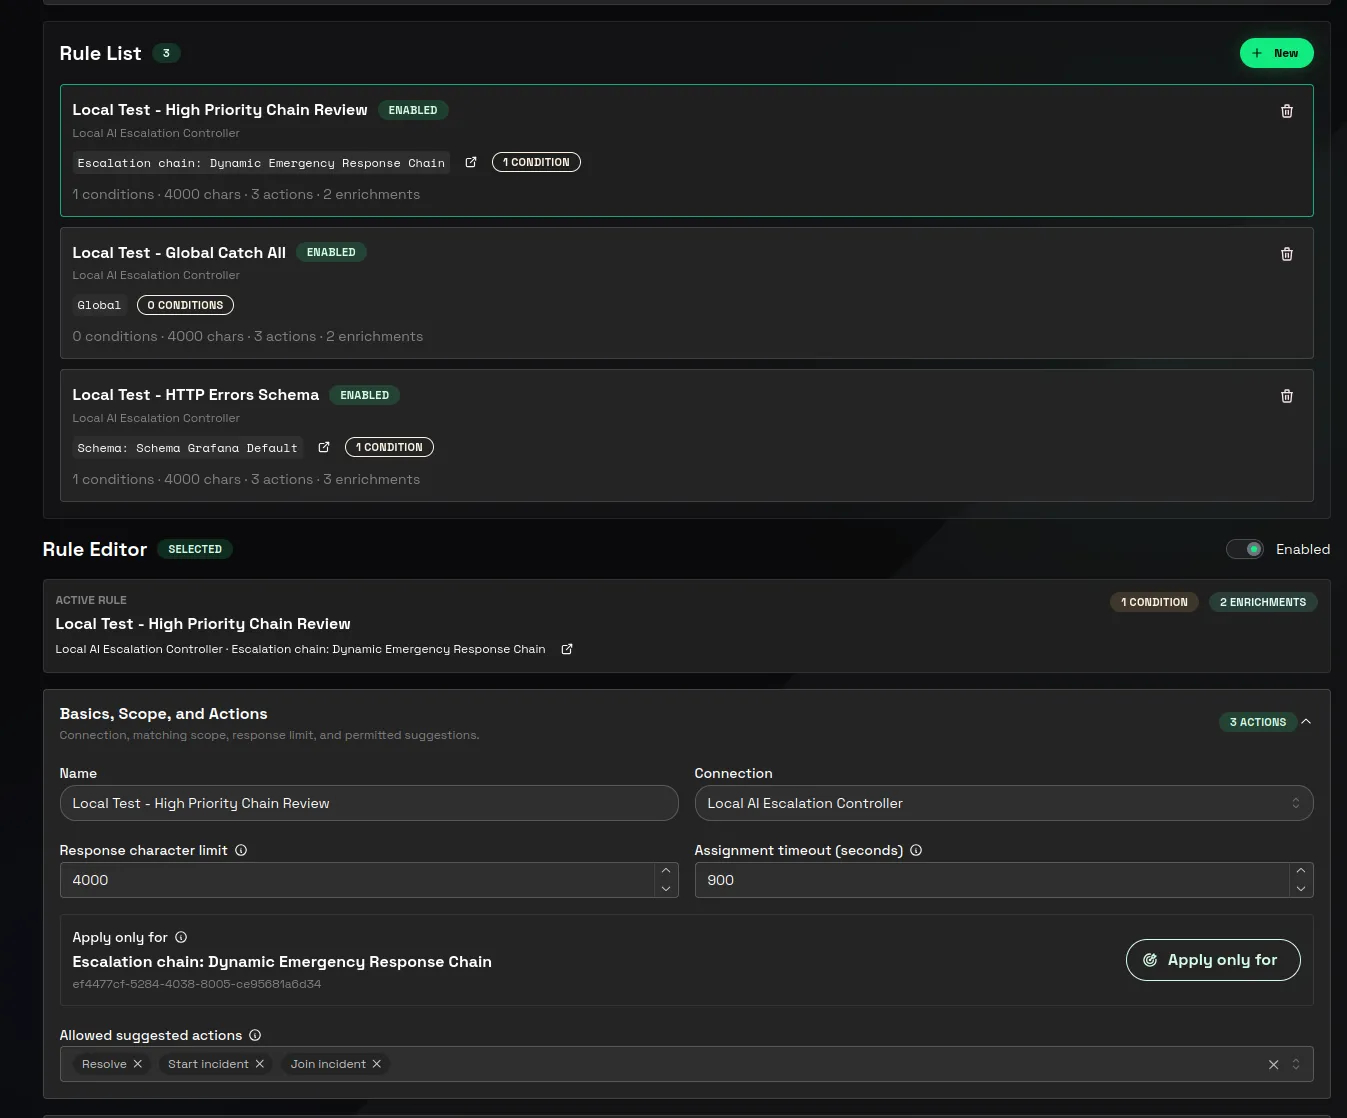
- Create a scoped rule with Conditions, enrichments, Allowed suggested actions, Response character limit, and Assignment timeout (seconds).
- Open Alert Instances, open a test alert, and click Escalate to AI.
- Review the AI assignment response and Suggested Actions.
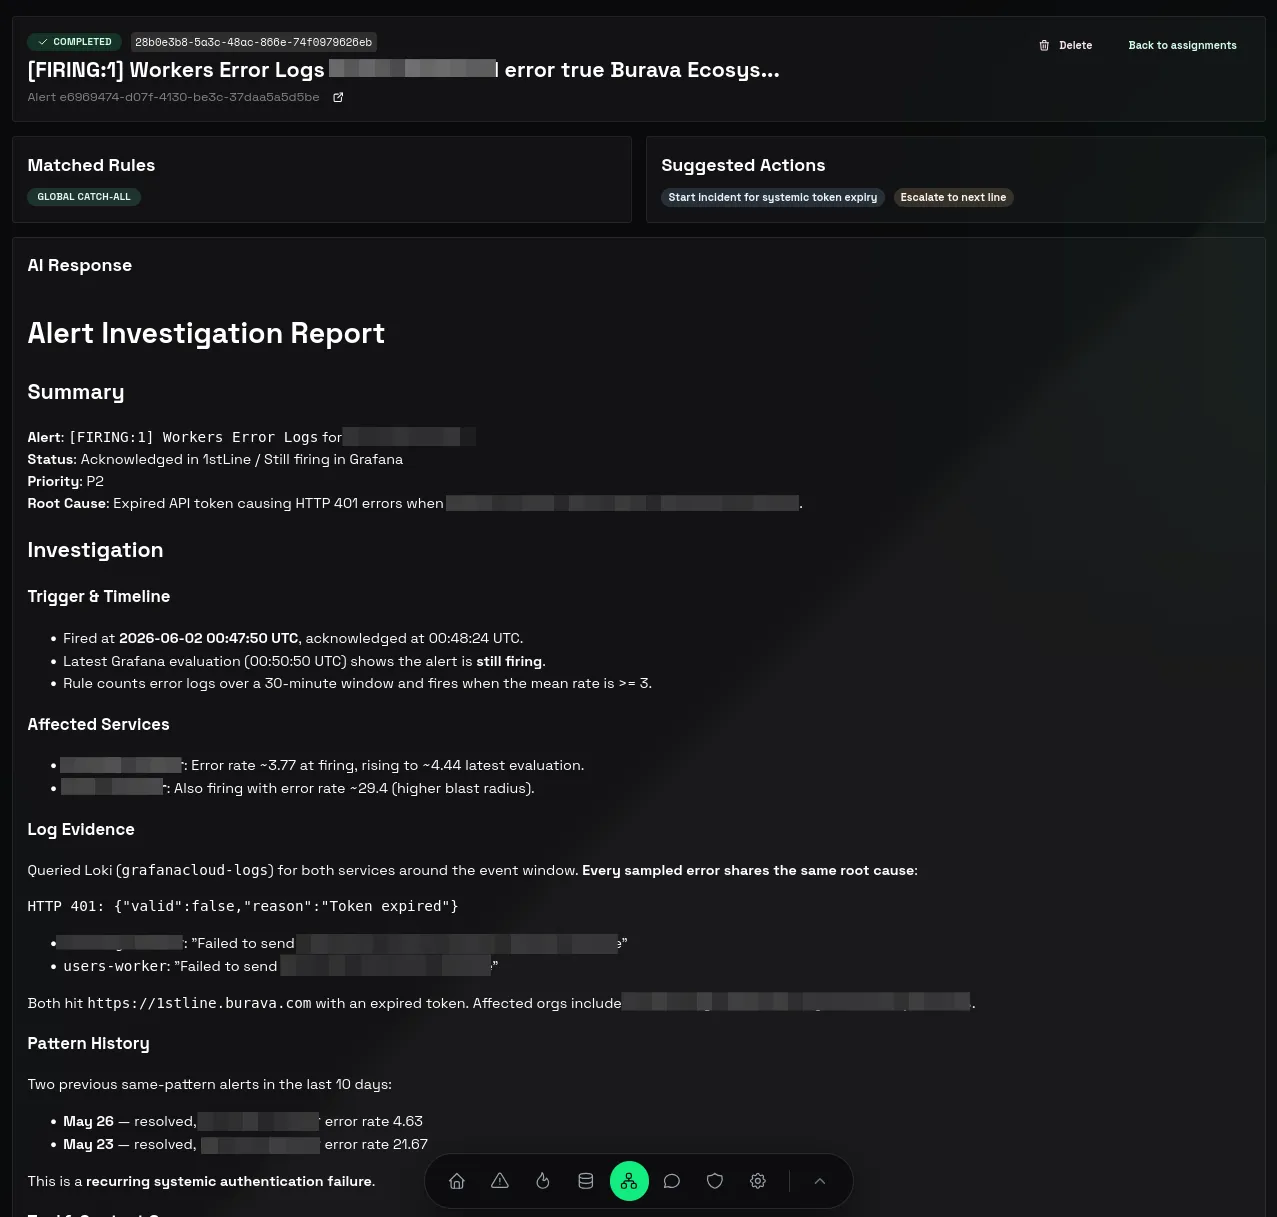
See Set Up AI Escalation Controller, Create AI Escalation Rule, and Review AI Escalation Assignments.
18. Try incident response
- Open Incidents.
- Use Start incident or Join incident from an alert when you want to test incident response.
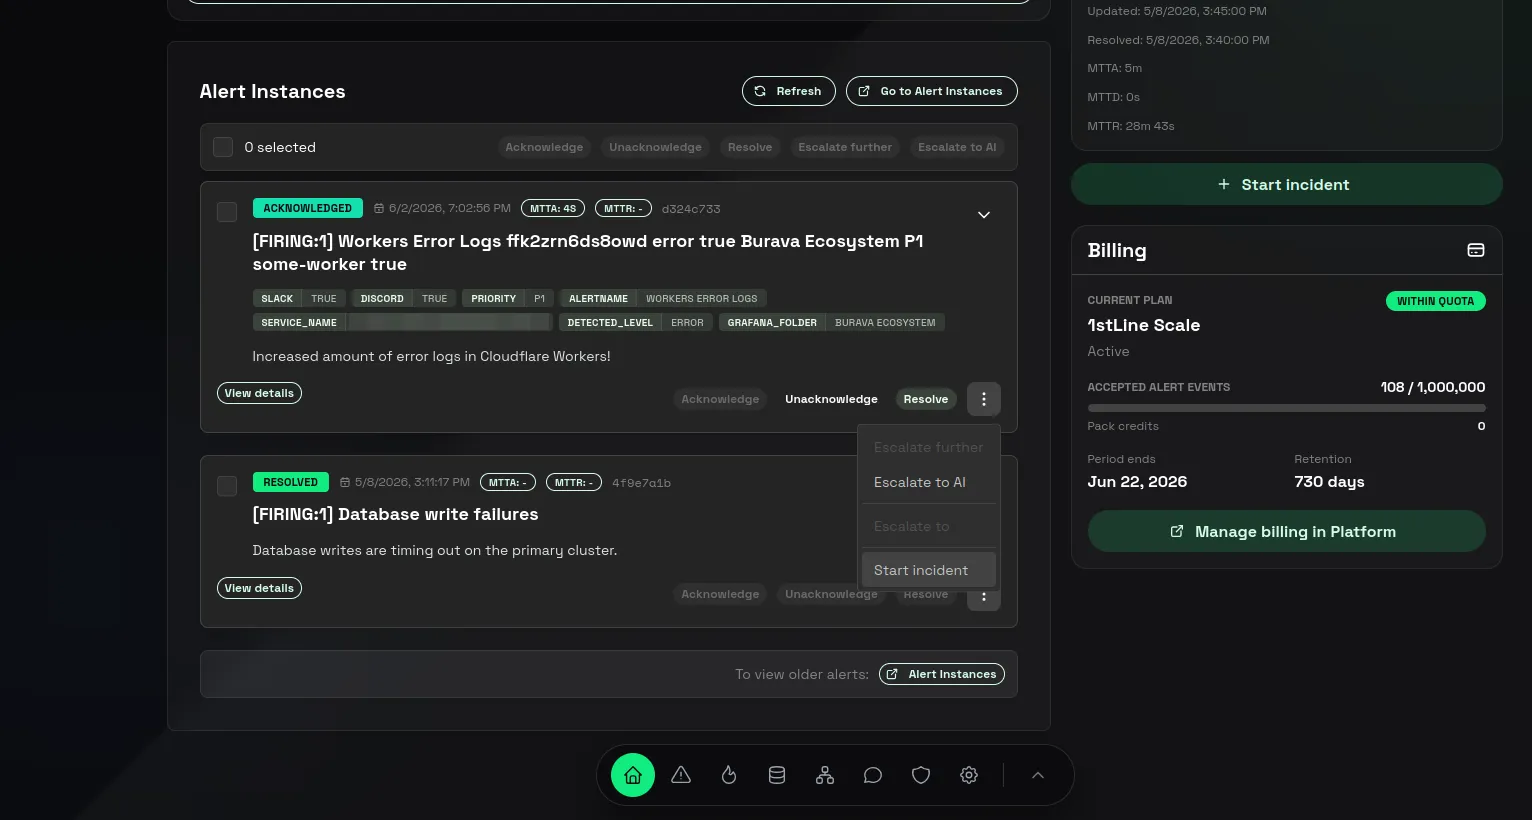
- Add notes and actions so your team can see the response timeline.
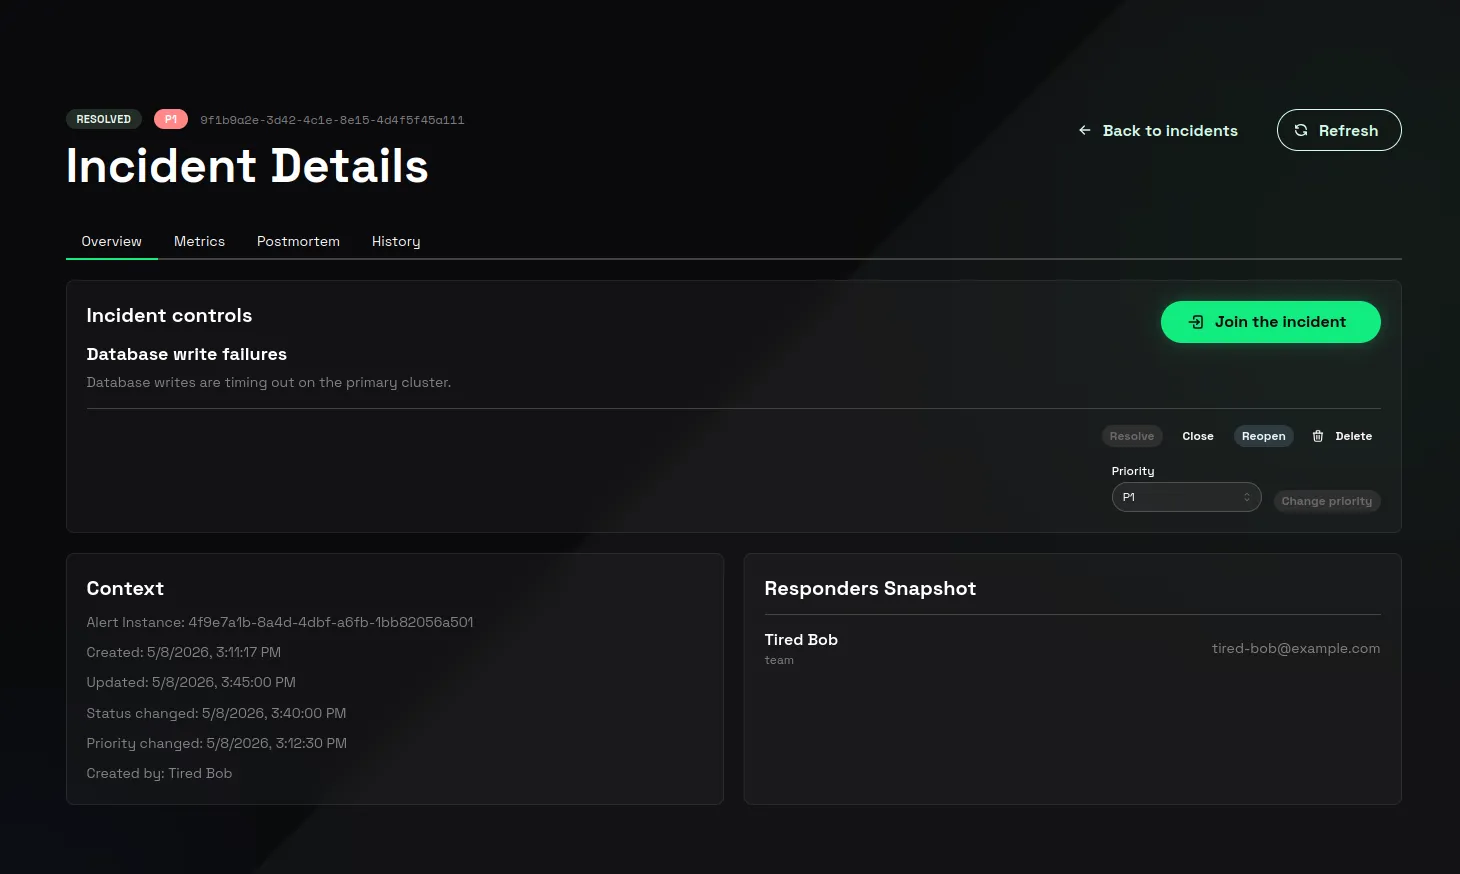
See Incidents for more information about Incident Events, Incident Actions, and Incident Alert Instances.
After the first flow works, you can add more Lines and Line Members, create more specific Routing Conditions, adjust Communication Rules, test Schedules, and configure Incident Actions.
*Google is a trademark of Google LLC. Burava does not own, represent, or speak for Google.
*Slack is a trademark of Slack Technologies, LLC. Burava does not own, represent, or speak for Slack.
*Grafana is a trademark of Grafana Labs, Inc. Burava does not own, represent, or speak for Grafana Labs, Inc.